Tuesday, February 23, 2010
Web 2.0 - Rubric
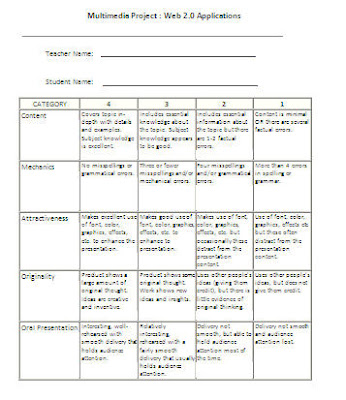
I have created a rubric using Rubistar to evaluate these Web 2.0 applications. Below is an image of the rubric. If you would like a hard copy of it please let me know and I will get it to you.


Web 2.0 - Animoto
I love Animotos - they rock and the kids love them! They are fun and easy to create. The directions are below.
Other projects that have been created can be added into Animoto as long as they are jpegs. I have often taken student’s trading cards, magazine covers, Wordles, and other pictures they have made and put them all together in an Animoto for the students to see everyone’s projects at one time.
- Click the link to go to Animoto for Educators
- Complete the process to create an account. Educators can sign up for a free account with all the features of a paid account. Once your account has been processed you will receive an email from Animoto with the directions for completing the log in process.
- Once your account is created and you log in you will see the following screen. Click the “Create Video” option from the menu bar.
- Follow the steps to create an Animoto. First, choose your video type. Select the Full Length option to begin the process.
- Step 1 is to select your images and/or video. You can upload from your computer, select from their collection, or retrieve from another site like Flikr or Facebook.
- Next edit your photos that you uploaded. You can add text between the photos and reorder photos by dragging and dropping them to their new location. All editing features are at the bottom of the image gallery.
- Step 2 is to add your music for your Animoto. Animoto offers a large selection of royalty free music to choose from or you can upload your own music. With students I always have them use the music that Animoto offers for copyright purposes.
- Once music has been selected click the Save and Continue button to move to the next step.
- Step 3 – finalize your video. Here you can change the speed and select the video cover. I usually leave the speed on the default setting. ½ speed moves really slow and 2X speed is really quick for students to see the pictures. I like to start with the green screen on the videos. When finished click Continue. The next screen will have you enter a title, description, and the producer of the video. When finished click Create Video.
Other projects that have been created can be added into Animoto as long as they are jpegs. I have often taken student’s trading cards, magazine covers, Wordles, and other pictures they have made and put them all together in an Animoto for the students to see everyone’s projects at one time.
We 2.0 - Dumpr
Another Web 2.0 application that I presented at TATN.

You can embed the photo into a website, upload it to Flikr, send as an email, or save (if you have created an account).
Usually I use “Print Screen” or a capture software (SnagIt) to copy the student’s image and then crop it and add it to a Word document, PowerPoint, or other formats for the students to type what they have taken a photo of and their facts about the photo. This also provides them a place to put the necessary Copyright information for their picture source.
- Click on the link to go to Dumpr
- Select an effect to begin the process of creating a digital effect photo.
- Upload your photo from your computer.
- Click Continue to process your picture into the effect you chose
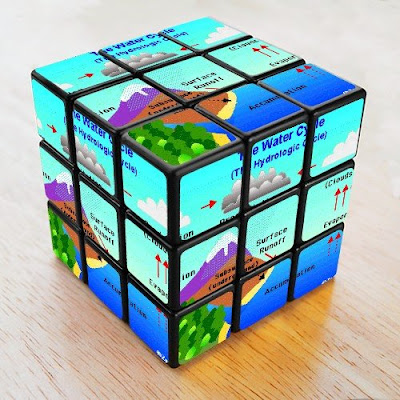
- Your new image will appear on the screen. Below is the water cycle rubik's cube that one of my students created.

You can embed the photo into a website, upload it to Flikr, send as an email, or save (if you have created an account).
Web 2.0 - Big Huge Labs
Another Web 2.0 tool that was in my presentation.
Trading Cards
Magazine Covers
- Click the link to go to Big Huge Labs
- Select an option from the menu. I usually use the Magazine Cover and Trading Card options with the students.
Trading Cards
- Select a photo to use.
- Select your positioning for your photo and background for your trading card.
- Add a Title, sub title (if desired), and text based on facts collected.
- Click Create to generate your Trading Card.
- Once your trading card has been created you can save it as a picture file (jpeg) and add it to a PowerPoint, Animoto, Word document, or other display format.
Magazine Covers
- Select a photo to use.
- Select Colors, Titles, Taglines, Publication Date, Font, and Price (all options are optional)
- Based on the information you would like to display on your magazine cover you can use the text lines to put important facts in as article titles. Students can be creative to pick interesting words to highlight topic points.
- Click Create to generate your Magazine Cover.
- Use the edit button to make changes. Students may have to adjust the text several times during the process to make sure all of their text appears. Sometimes it is easier to break text over multiple lines.
- Once your magazine cover has been created you can save it as a picture file (jpeg) and add it to a PowerPoint, Animoto, Word document, or other display format.
Web 2.0 - Wordle
One Web 2.0 application that I presented while in Austin was Wordle. Below are the directions for creating a Wordle.
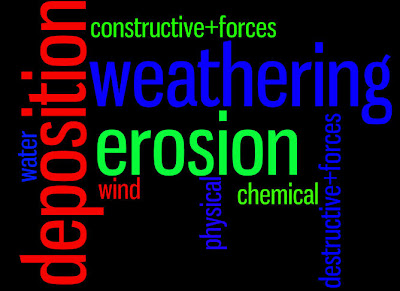
Completed Wordle about Earth Science:

- Go to Wordle
- Click on “Create your own” to begin the process.
- Students can either type text or paste it from a Word document. I always have students copy and paste their words from a Word document so that we can make sure the words are spelled correctly. If you want a word to appear larger than other words you simply need to repeat the word in the list. Once the list is complete click “Go”.
- Once the Wordle has been generated you can play with the layout and colors by clicking on the options in the Menus. As you change options the Wordle will automatically update to reflect the changes.
- Once you have made your changes click the “Open in Window” button. The Wordle will open in a separate window. Once there you will need to click print screen to copy the page and then crop the picture and save as a jpeg. If you have screen capture software then that works too.
Completed Wordle about Earth Science:

Monday, February 8, 2010
TCEA 2010
I'm here in Austin at TCEA 2010. It's going to be an exciting week and I will be posting on things that I am learning at the conference. Check back throughout the week to see what I will be up to this week.
Subscribe to:
Posts (Atom)

